Canned responses are pre-written messages that help you respond to common queries faster. This saves time and ensures consistent messaging, improving your team's efficiency and customer satisfaction.
Use Canned Response in a conversation
- Quickly canned response
To quickly insert a canned response into a conversation, simply type a forward slash (/) followed by the shortcode. When creating canned responses, assign them short, memorable codes for easy access.
- Select a canned response
1. Locate the canned response icon  in the Reply box.
2. Search for the desired canned response using keywords or by browsing through categories.
3. Preview the selected response to ensure accuracy, then insert it into the conversation.

Creating a Canned Response
To create a canned response:
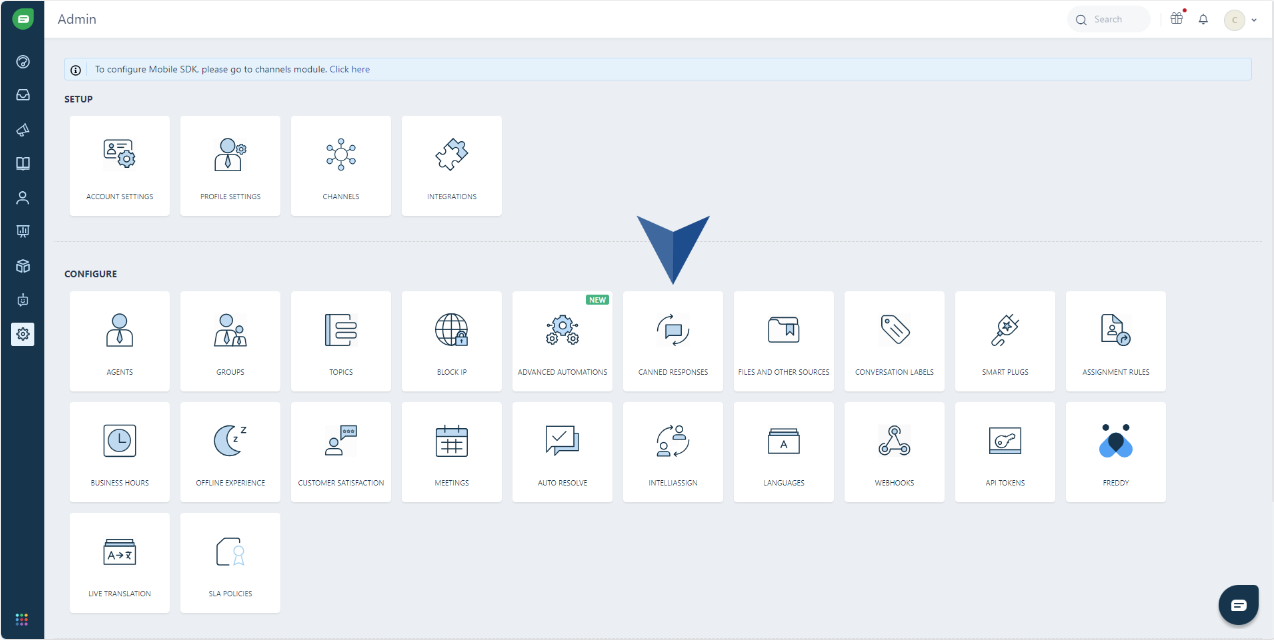
- Go to Admin and select Canned Responses.

2. Create a New Response: Click the New Canned Response button.

3. Give your canned response a clear and concise title, such as "Closing a conversation."
4. Write a detailed and informative response. You can include images, or formatting to enhance the message.
For example:
Thank you for reaching out to us, {{user.firstName}}! I’m glad I could assist you today. If you ever need more help, don’t hesitate to contact us. Have a great day!
5. You can then define the response's content, assign a short code for quick access, and categorize it for easy organization.

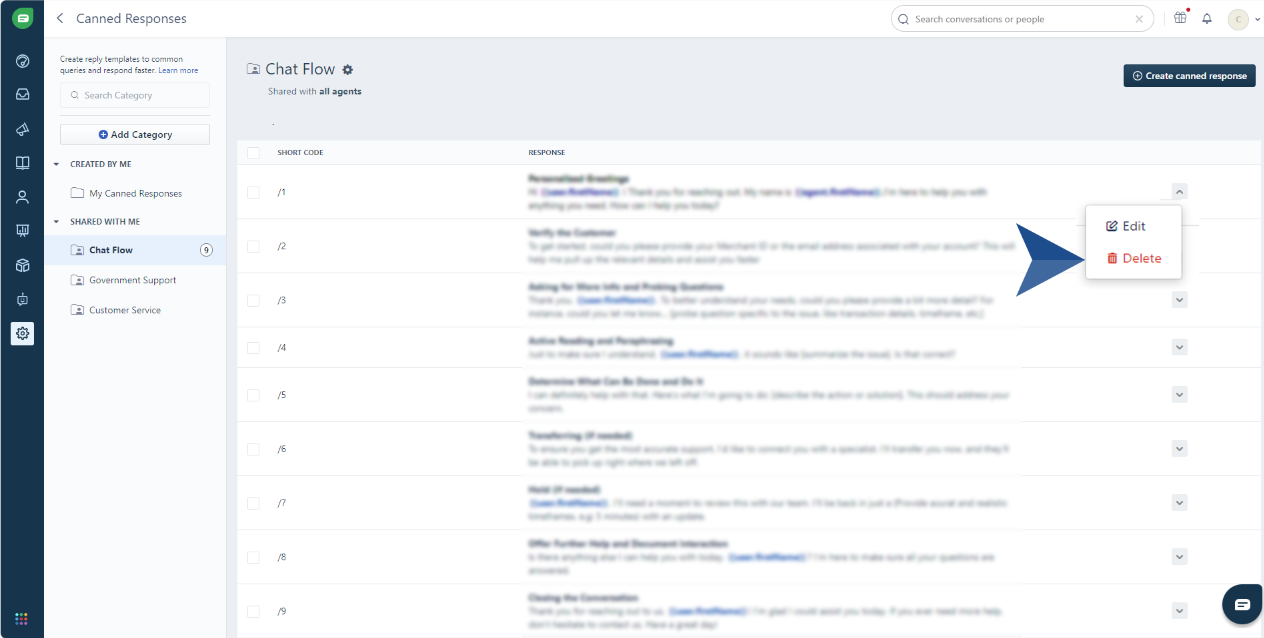
6. You can easily remove canned responses that are no longer needed.

7. You can also organize your canned responses by moving them between personal and shared folders. This allows you to categorize responses for better management and easier access.

Creating a New Category
By creating well-organized categories, you can easily find and use the right canned responses for any situation.
To create a new category, locate and click the Add Category button.
 2. Name the Category: Give your category a descriptive name (e.g., "Technical Issues," "Billing Inquiries," or "General Support").
3. Choose whether the category should be personal or shared with specific agents or teams.
Best Practices for creating Canned ResponsesBy following these best practices, you can maximize the benefits of canned responses and enhance your team's efficiency and customer satisfaction.
Clear and concise: Keep your canned responses concise and easy to understand. Avoid unnecessary jargon or technical terms.
Personalized touch: While canned responses can save time, personalize them whenever possible. Use the customer's name or reference specific information from their conversation.
Regular review and update: Periodically review your canned responses to ensure they are accurate, up-to-date, and effective.
Use Shortcodes Strategically: Assign short, memorable shortcodes to frequently used responses.
Tips for Using Canned Responses
Following these tips will help you leverage canned responses to boost efficiency and deliver better customer support.
Quick access: Use the shortcodes to quickly insert canned responses into your conversations.
Customize as needed: While canned responses provide a solid foundation, personalize them to fit the specific context of each conversation.
Balance automation and personalization: Use canned responses judiciously to avoid sounding robotic.
Provide Feedback: Share feedback with your admin team on the effectiveness of canned responses and suggest improvements or additions.
